Thursday, May 31, 2012

Photography Goal

Chandler Coomes

Final Photography Goal
My original goal was to just explore all the different types of photography, and learn new techniques and styles. I believe I met that goal because in class we did many different labs. My favorite of those labs was the painting with light lab and the food lab. I liked the painting with light lab because it was very different from what I had ever done, and it was very interesting to see the turn out of the photos. I liked the food lab because I liked how appealing or dramatic we could make the food look with just changing the lighting. 

Tuesday, May 8, 2012

Portrait Blog

Portrait Blog
When photographing the model, it was much easier because the shutter speed did not have to be very fast, but fast enough that we did not need to use a tripod. But when we photographed the ducks and the dog, we had to use a much faster shutter speed, because they would move around a lot since communication was not an option with them. When we were outside we had to change the shutter speed and aperture from what they were set for inside.


Tuesday, April 3, 2012

Painting with Light


The technique used in the painting with light starts with changing the ISO to a lower number, like 100 or 200. Then, set your exposure to a long one, and make sure your camera is still in order to get rid of blurriness. Also, the aperture must be set to a lower number, in order to capture the great depth of field. Painting with light is a photographic technique that uses a flashlight or other hand held light source to "paint" with in a low aperture photo. In order to create these photographs, one needs a flashlight or other hand held light source, a camera set on a long exposure, a tripod, and a dark setting.
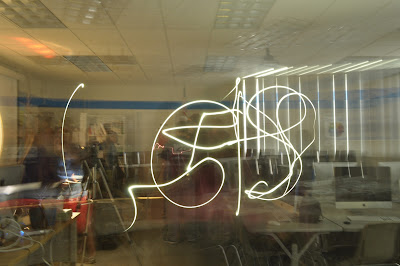


During my experience with painting with light, I discovered many things that worked well, and some that did not work so well. In the first picture above, we were trying to spell out a name, but it was not working because the camera kept moving, which created the blurry effect. In the photo below that one, we discovered how to draw out certain characters. When we drew the cat picture, we had discovered the mode that enabled us to hold down the button until we were done so we could achieve the perfect shutter speed. One thing that could have made the experiment better is if it were darker in the room.


Monday, March 5, 2012

Camera Raw

Original Photo
Retouched Photo

To get from the original to the retouched, I used:
  • Fill light tool to lighten up the background.
  • Contrast tool to define the lines a little more
  • Vibrance tool to make the colors stand out more 
  • Highlights tool to highlight the background
  • Lights tool to lighten up the subject
  • Darks tool to darken and further define some of the lines
  • Luminance-Yellows tool to make the yellow lighter and brighter
I chose this photo to put on my blog because I like the bright colors that were enhanced from the original. I also like this photo because I like the sharpness of the subject, and everything else around it.


Monday, February 27, 2012

Composition Assignment 1


This photo by Jennifer Vela represents vertical composition. It gives depth to the picture and is able to fit more into the frame since the subject is longer than it is wide.
 This photo by Rami on Flickr shows Visual balance because there is a balance of colors and objects in the photo.
 This photo by Melissa A. on Flickr represents fill frame because the subject fills almost the whole frame, and it is a close up.
 This photo represents horizontal compisition. It gives depth to the photo, and allows it to capture more because the subject is more wide than it is tall.
 This photo by Norbert on Flickr represents leading lines. The line that goes throughout the entire picture draws attention, and pulls people in.
This photo by Eline Art on Flickr shows rule of thirds. The subject of the photo is on the lines where it is supposed to be. It draws attention to the photo.


Illusion of Perspective
This photo demonstrates the Illusion of perspective really well because from this perspective it gives the illusion that the sidewalk is getting smaller, but it really is not. This is the best retouch because the contrast between the grass and the rest of the picture captures one's attention. 

Monday, February 6, 2012

Comparing Scene Mode and Aperture

f/8 by Chandler_C_1dp
Aperture Priority
f/8
Scene Mode
Portrait Mode


                     These two photos are similar because they are both indoor photos. Also, they are similar because they are both very bright and defined, there is not much noise created in either photo. They are different because the aperture photo was taken with an aperture of f/8, and the scene mode photo was taken in with an aperture of f/3.2. Also, the scene mode photo was taken in portrait mode, while the other photo was taken in aperture priority mode.


Thursday, January 26, 2012